Dexcom Stelo CGM Review: My (Unsponsored) Opinion

I used the Dexcom Stelo OTC CGM for two weeks to monitor my glucose levels.
For context, I am not diabetic or pre-diabetic, but I wanted to hold myself accountable to make healthier meal choices and better understand how different workouts impacted blood sugar.
Here's an (unsponsored) overview of the product and how I used it.
What is The Dexcom Stelo?
The Dexcom Stelo is the first over-the-counter (OTC) CGM to receive FDA clearance.
Until recently, CGMs were only available with a doctor's prescription.
But more and more people without diabetes are interested in tracking their blood sugar, as it's a useful tool for weight loss, improved athletic performance, and better overall health.
Thus, Dexcom Stelo became available to consumers in March 2024.
Since then, the Abbott Lingo was also cleared by the FDA, but these are the only two OTC CGM currently on the market.
And while the Dexcom Stelo isn't intended for people with diabetes, it still functions similarly to traditional CGMs. You wear a sensor that lasts about 14 days, and it transmits your glucose data to the Stelo app. The app also lets you log meals, workouts, and other activities that may affect your glucose levels.
Here's a more detailed explanation of how you can get started with it.
Applying The Sensor and Setup
I purchased my Dexcom Stelo through Amazon, and the box includes two sensors and an applicator.
First, I downloaded the app and created an account. It’s pretty simple and only took me a few minutes.
I also want to point out that it’s available on both iPhone and Android. This is an important consideration as its competitor (the Abbott Lingo) is not compatible with Android.
Next, it's time to apply the sensor.
I was quite nervous about applying the sensor myself, but it was surprisingly easy and painless. I've heard that some other brands require assembly, but the Dexcom Stelo doesn't.
You simply place it on the back of your arm and push.
I used this video for guidance:
You’ll also need to pair the sensor by entering a code on the applicator:

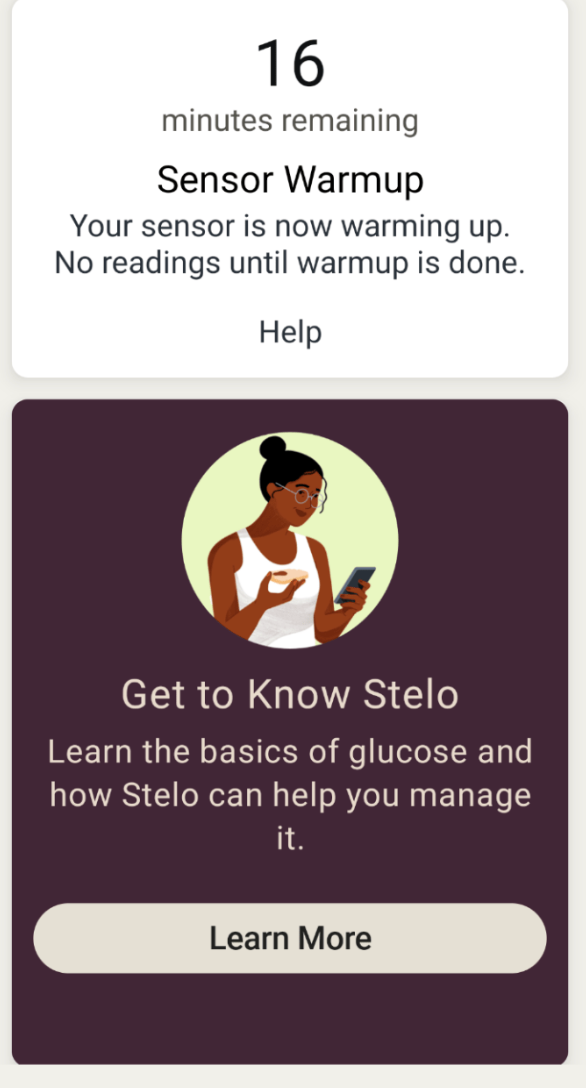
Once it's on, there's a roughly 30-minute warm-up period before you start seeing readings appear in the app.
Key Takeaways
- Quick (10 minute) setup process
- It works on Android and iPhone
- The application was much easier than I anticipated (and virtually painless!)
The Dexcom Stelo Sensor
Some CGMs require you to scan the sensor to record and demonstrate glucose data. Thankfully, the Dexcom Stelo doesn't require you to ever scan the sensor.
Additionally, some CGMs have a calibration feature to improve blood sugar data accuracy. (We have a more detailed guide discussing the accuracy of CGMs and why manual calibration is used.)
The Dexcom Stelo does not support manual calibration. However, several health coaches have anecdotally stated that Stelo is fairly accurate, potentially even more so than its competitor, Abbott Lingo.
Personally, I appreciate Stelo's overall simplicity.
Key Takeaways:
- No scanning required
- No manual calibration
Using The Stelo App
The Stelo app is also quite simple and beginner friendly, which is one of its main selling points.
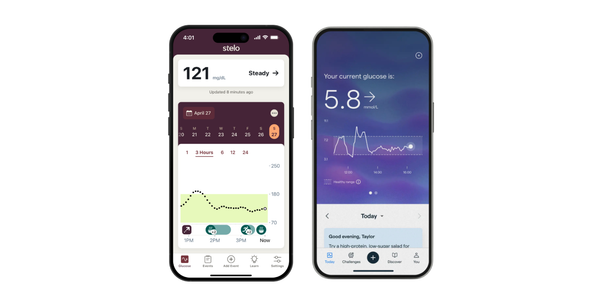
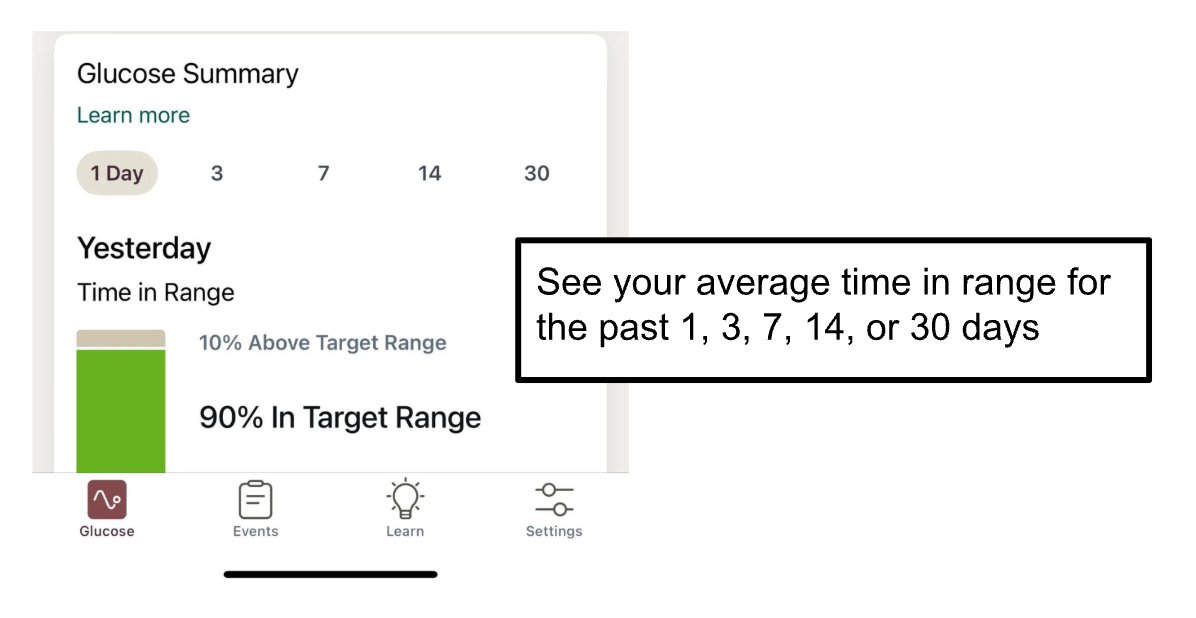
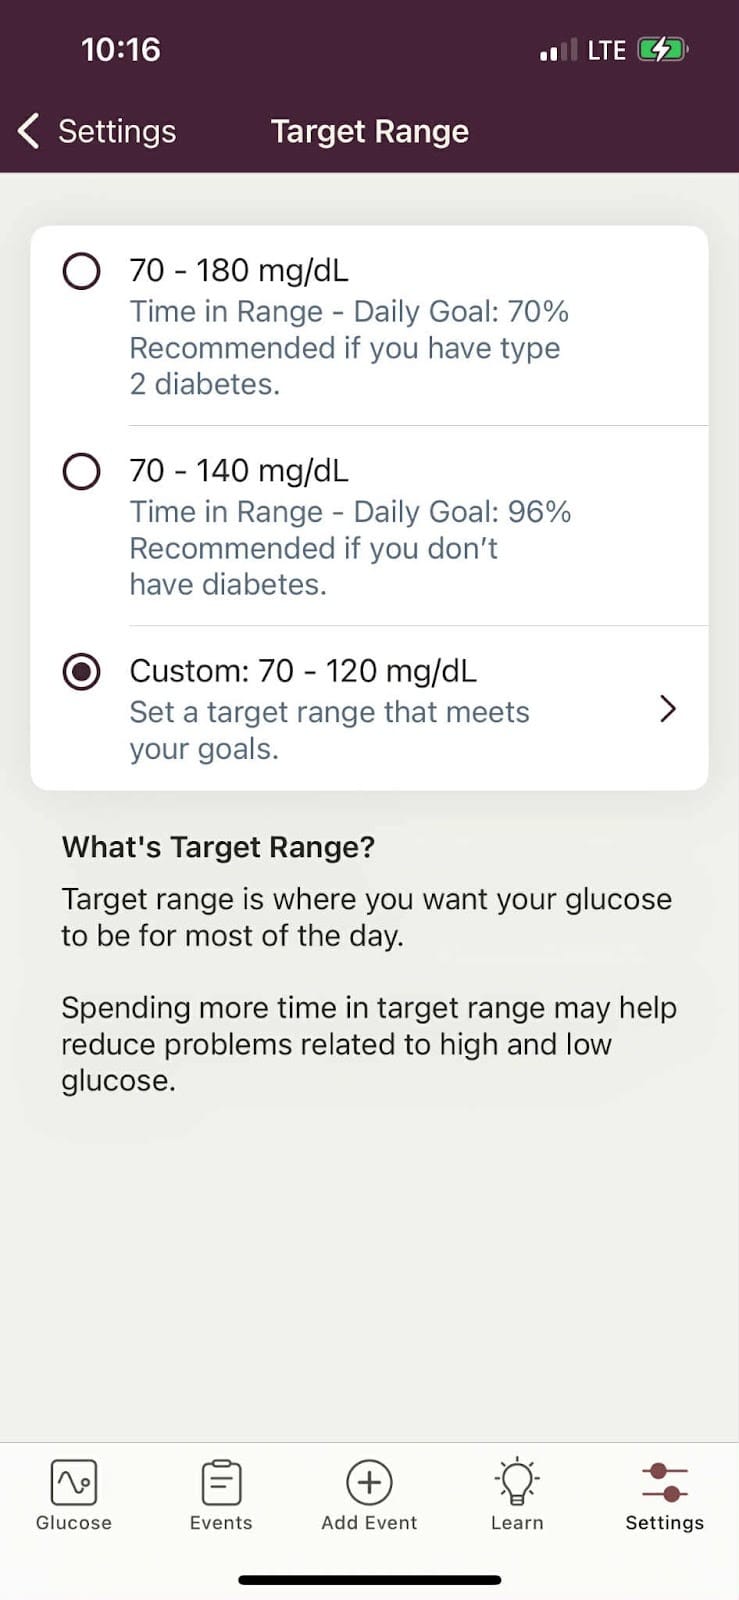
On the main dashboard, you'll see a line of dots indicating your glucose levels. The light green shading indicates your target range, which you can adjust.
Here, you can see that the target range is set at 70 to 120 mg/dL.
You'll also notice that you can scroll back to previous dates.
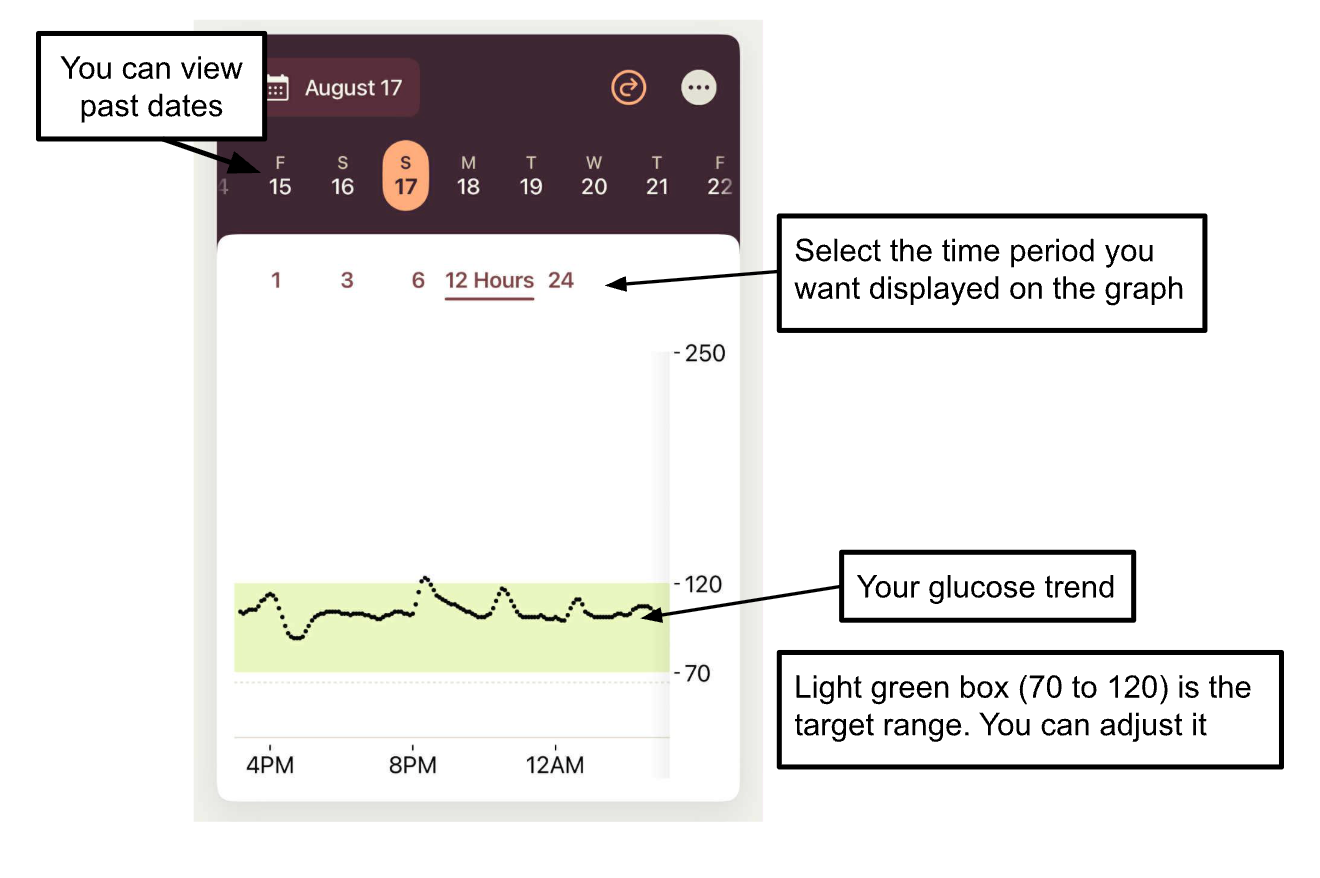
If you scroll down, you'll see that the app shows your average time in target range across 1, 3, 7, 14, or 30 days. This trend is useful because the idea of tracking glucose isn't to completely avoid spikes. Instead, aim to minimize the height and length of time of a spike.
However, you can adjust your target range. For example, you can see that I set a custom target range of 70 to 120 mg/dL:
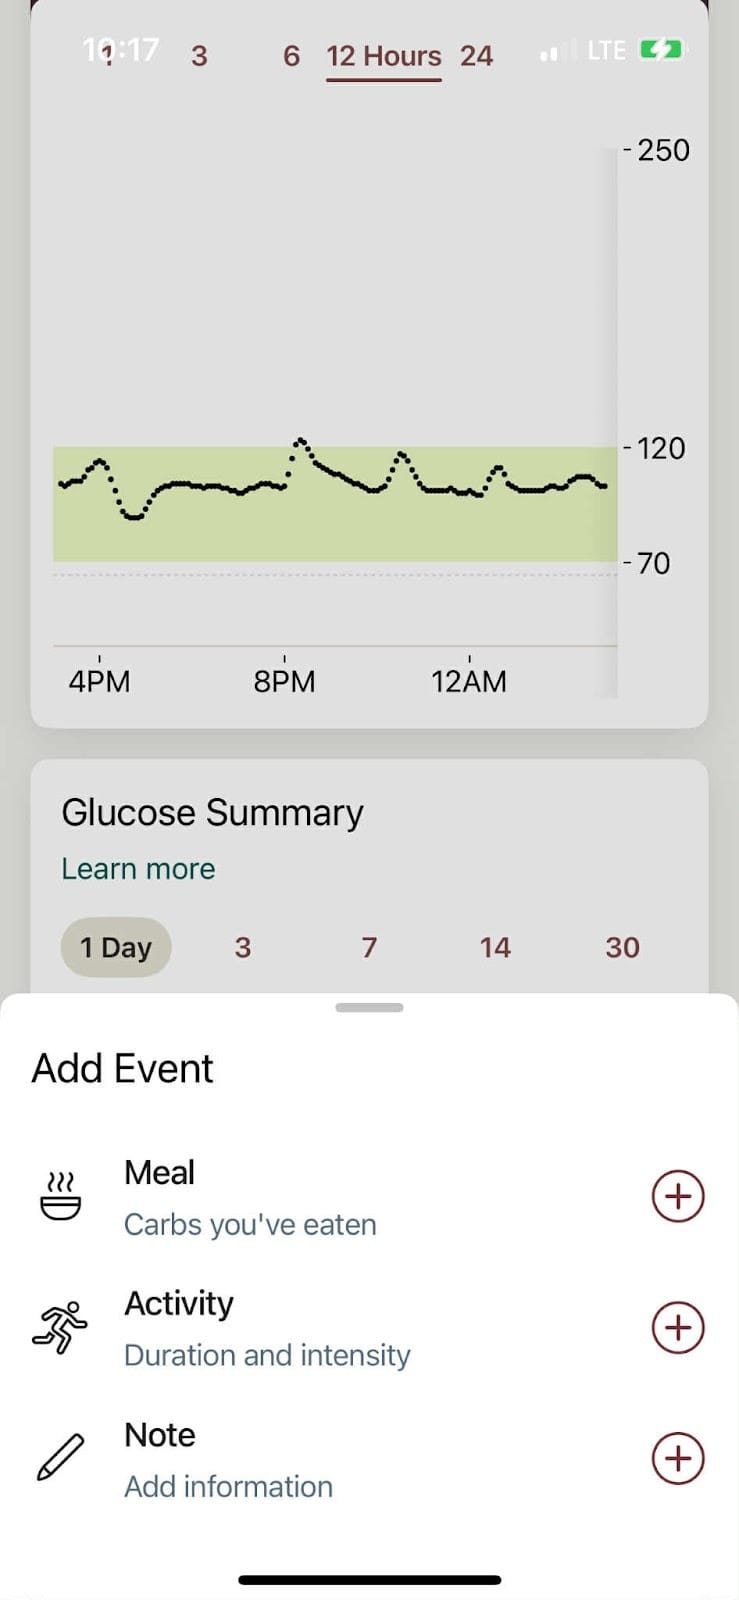
However, the real insights come from logging your meals and workouts so that you can see how different foods and exercises impact your blood sugar.
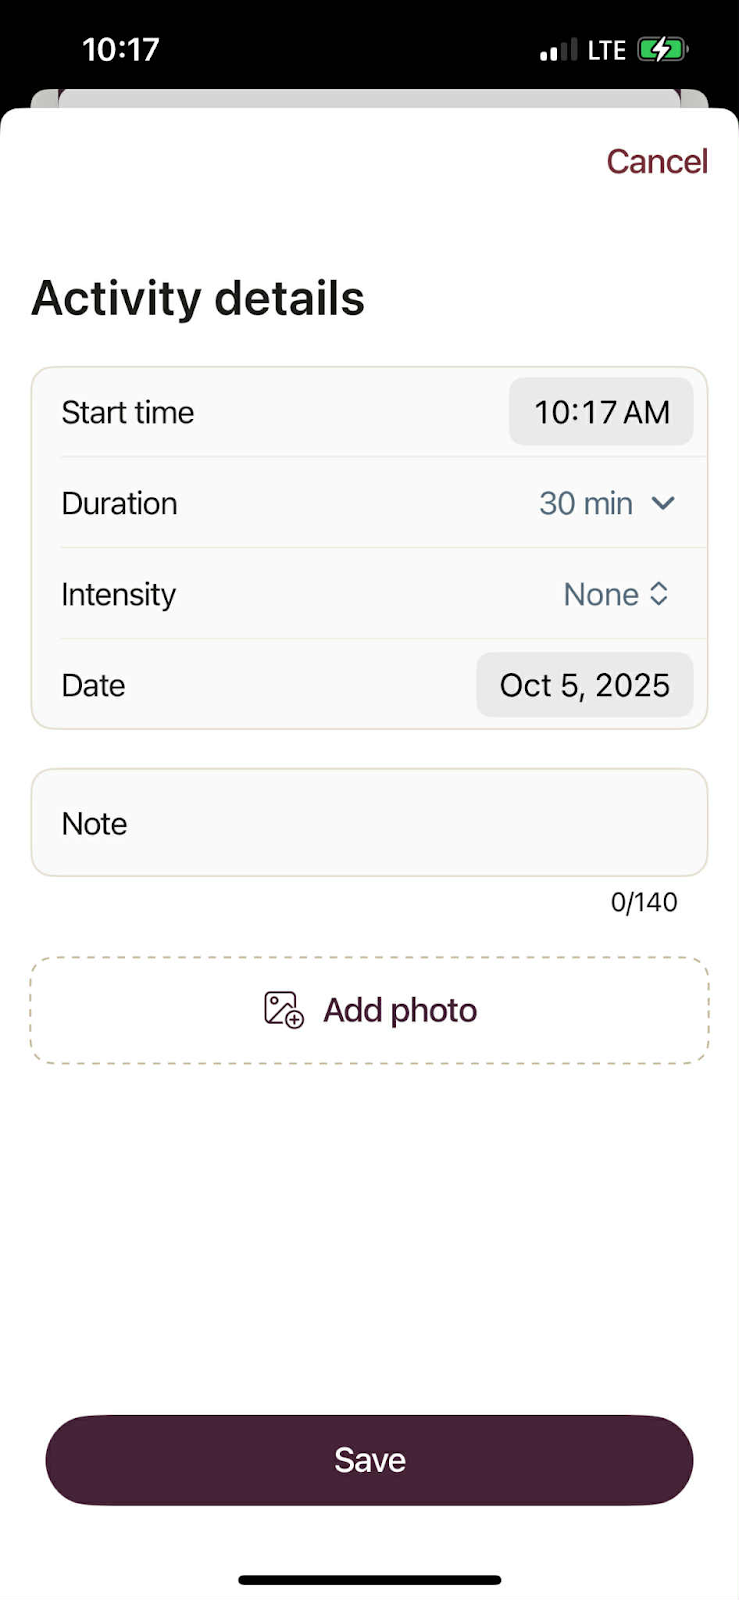
So be sure to log your meals and workouts:
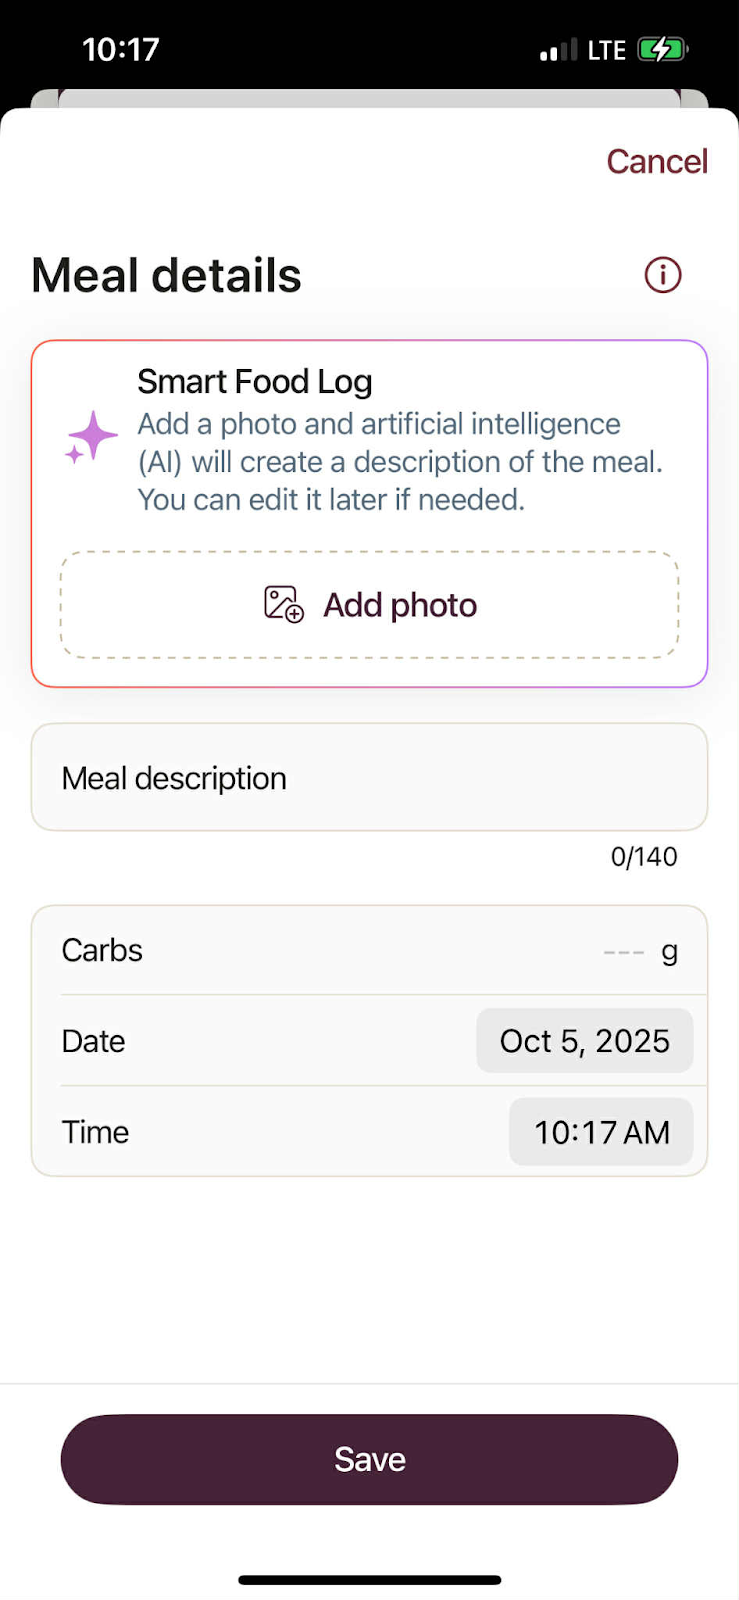
I appreciated that the app lets you upload a picture of your food, and it uses AI to generate a description for you. I found it fairly accurate for simple recipes, but you'll need to edit the descriptions for more complex ones.
You can also add the carbs and, of course, the time you ate.
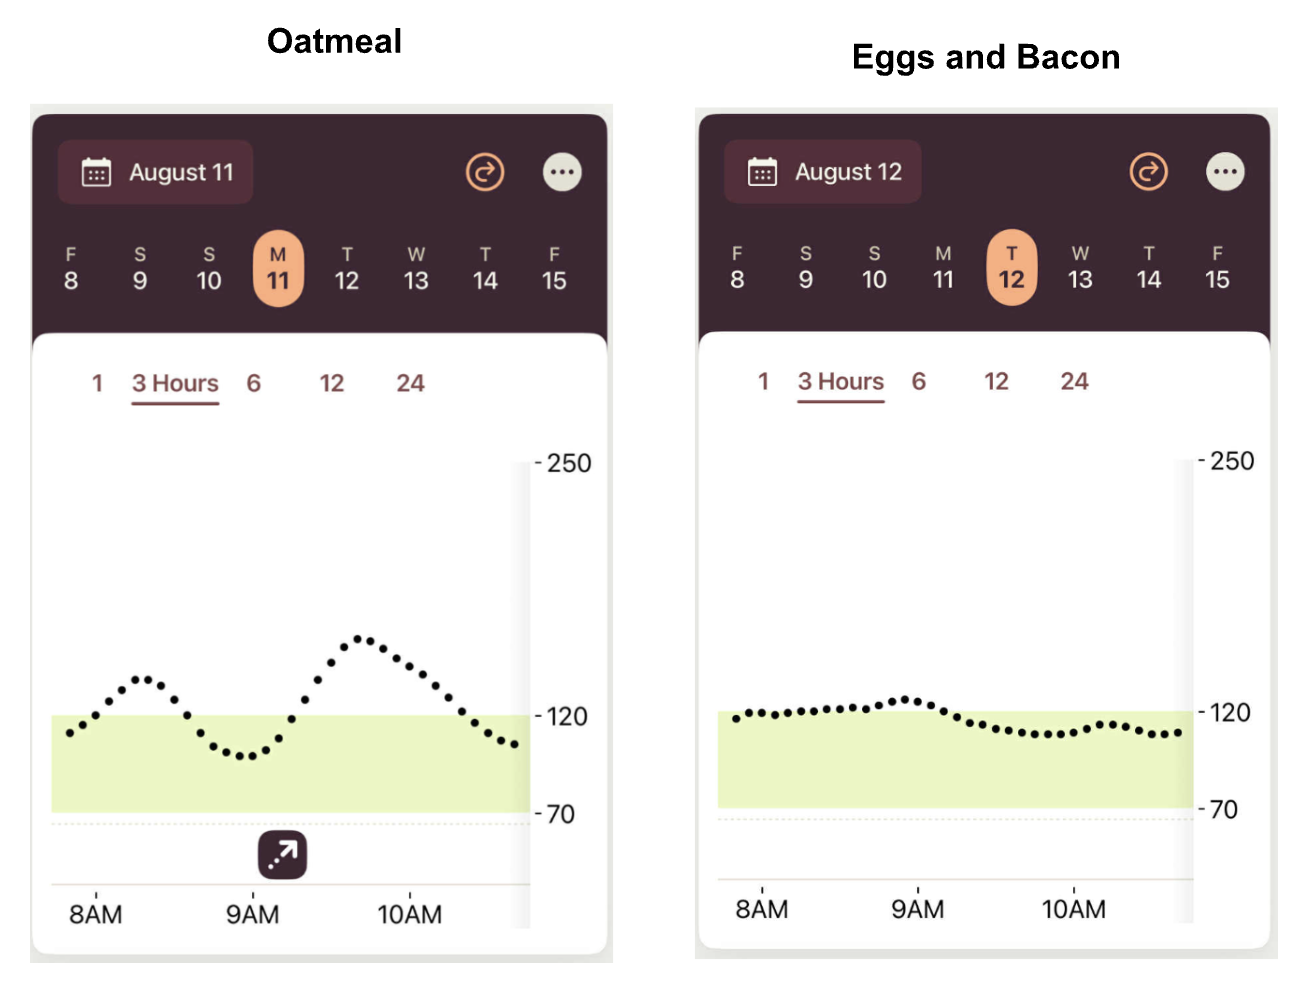
For example, I noticed that oatmeal spiked my glucose levels considerably, so I changed my typical breakfast to eggs and bacon.
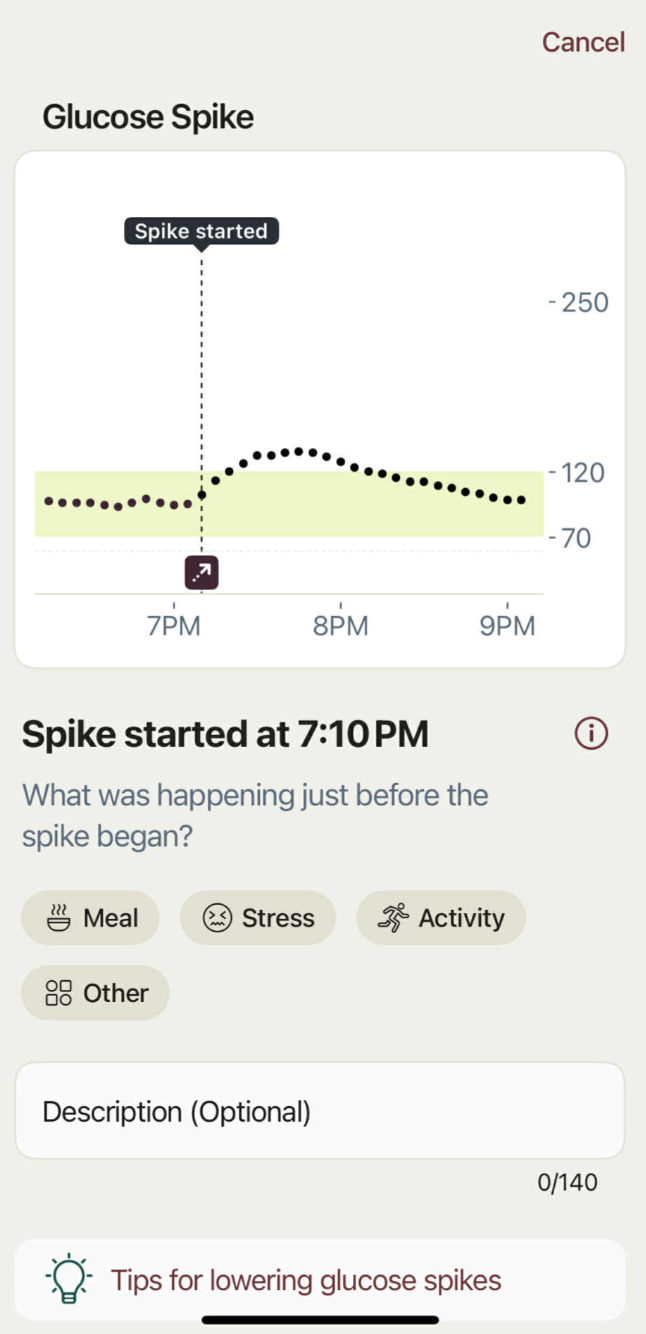
And, if you do have a major spike, the app shows it with an arrow.

If you click on the arrow, you can fill out what happened that caused the spike:
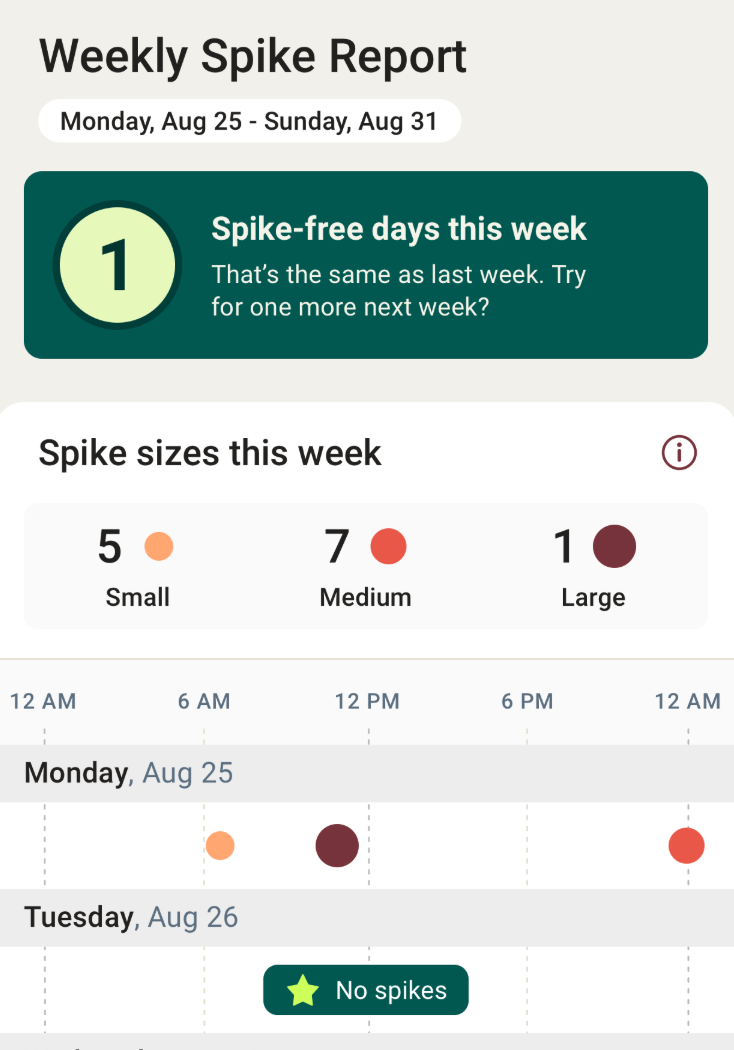
This is useful as the app will then show you trends that caused spikes. There’s also a weekly report showing all of your spikes:
The exercise logging was also very helpful for identifying patterns.
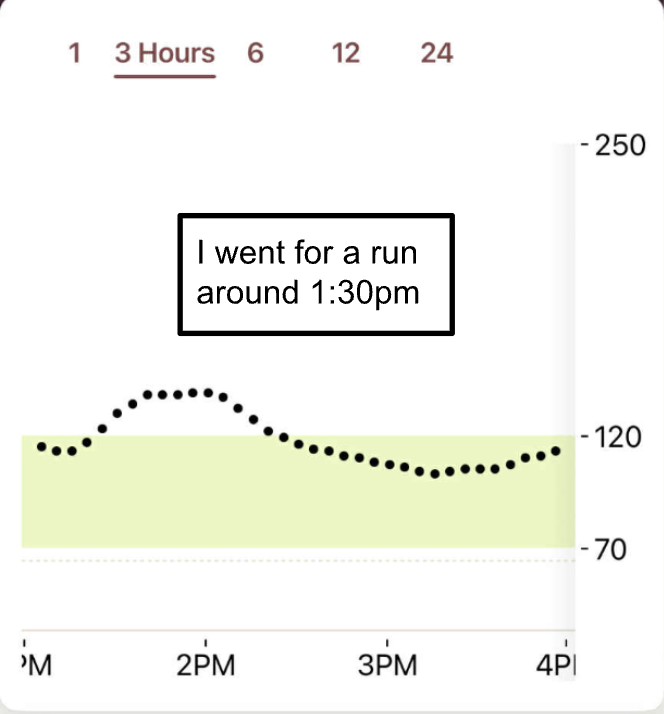
In general, I found that going for a run would typically raise my glucose.
For example, here I went for a run at about 1:30 PM. I've heard that running can raise or lower your glucose depending on the intensity.
In general, high-intensity cardio raises glucose levels, while low-intensity cardio lowers them. In this case, I went for a high intensity run:
However, I noticed that my blood sugar would usually drop when I weight-trained.
For example, here's a graph from the first day that I wore the CGM. You can see that my glucose dropped from a normal level of around 115 down to nearly 70.
I learned that as your glucose drops, your muscles have access to less glycogen, so I likely didn't maximize performance during this workout.
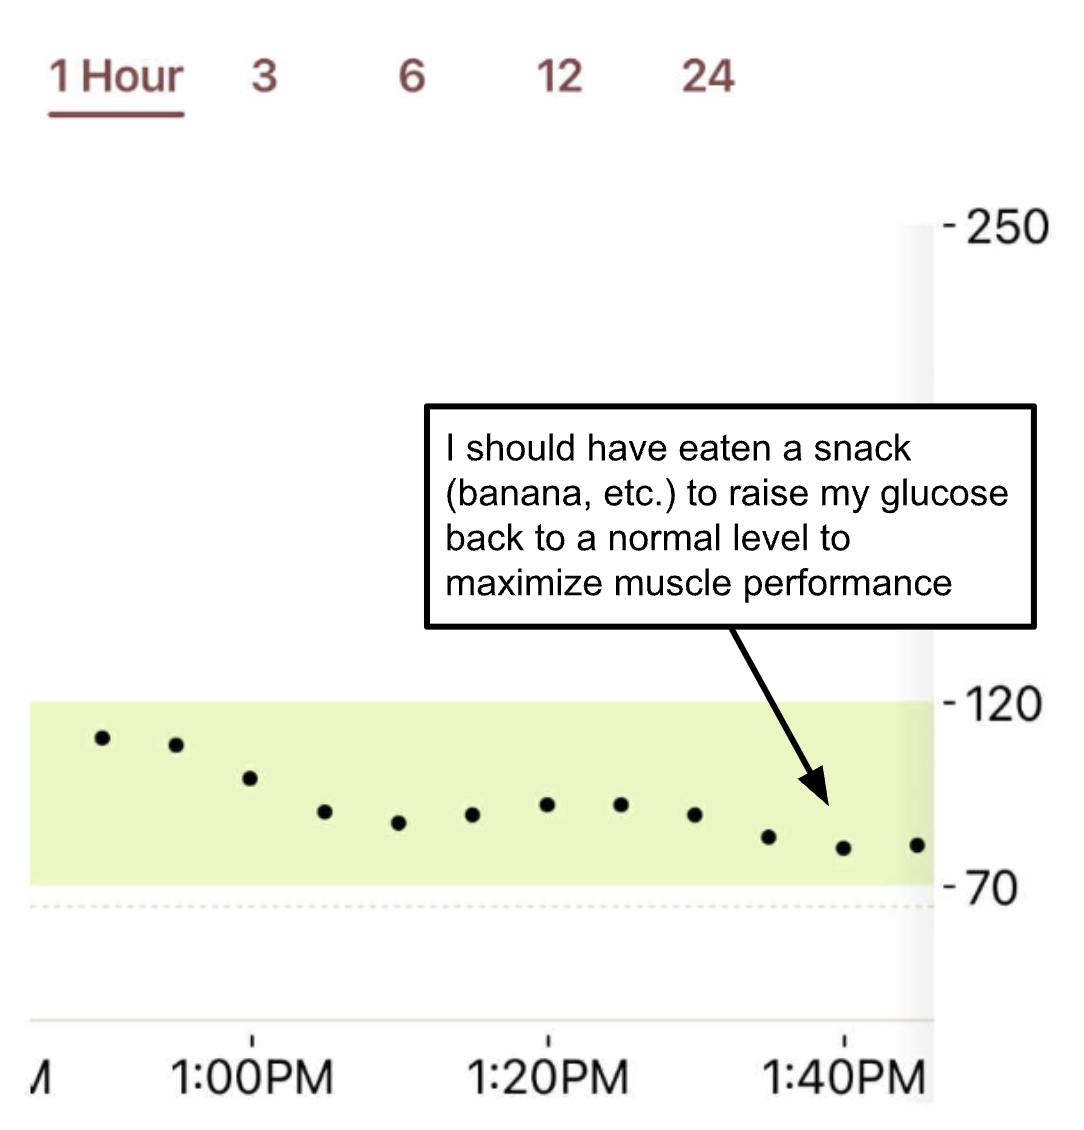
After learning this, I used the CGM data to identify when my glucose would drop and then pause and eat a banana or small snack to raise my glucose to a normal level.
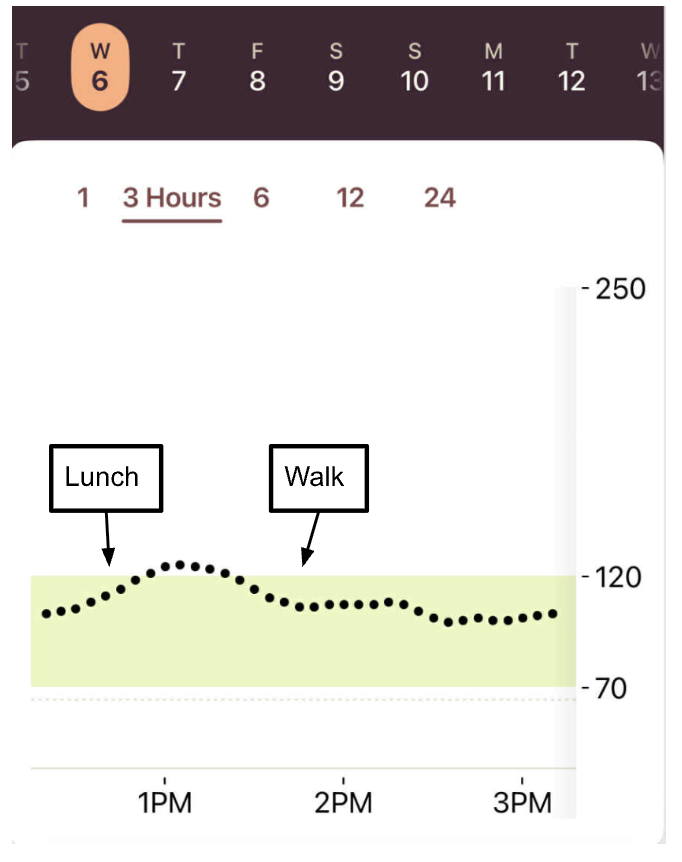
I also started timing my meals and activity around my glucose levels.
For example, I started going on walks after lunch to minimize how much my glucose levels would rise, and I did notice that this change helped me maintain steadier glucose levels:
You can also add other activities to the app, like sauna or cold plunge, as these can impact your blood sugar.
Key Takeaways:
- The app is known for its simple, easy-to-use interface.
- You can adjust your range (e.g., 70 to 120 mg/dL) and see your average time in range across a specific time period (1, 3, 7, 14, or 30 days).
- Log meals, exercises, and other activities (e.g., sauna/cold plunge) to see how they impact your blood sugar
- Scroll back through past days to see all of your historical glucose trends.
Dexcom Clarity
One common complaint about the earliest version of Dexcom Stelo was that it didn't provide much historical data in the app. Instead, you had to log into Dexcom Clarity to view your past data.
Since its release, Dexcom has added more historical data to the app, but Dexcom Clarity still offers more granular charts.
Here's an overview of the main dashboard of Dexcom Clarity:
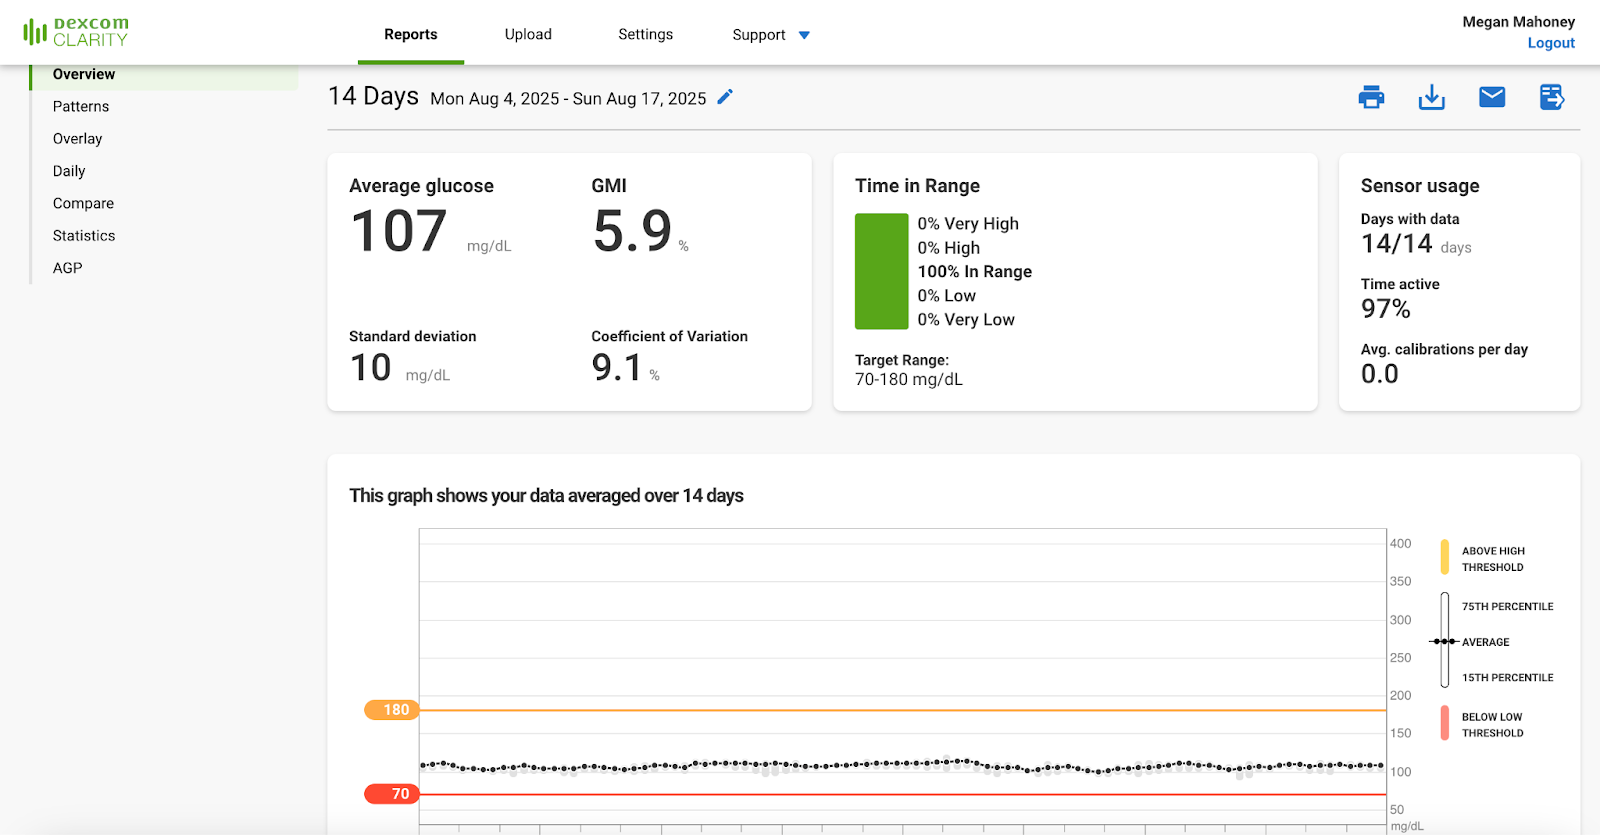
You can also drill down into specific patterns to see how specific meals and exercises impacted your glucose.
However, I found that the app alone was sufficient and I didn’t really use Dexcom Clarity at all.
The main benefit of Dexcom Clarity is that healthcare professionals and coaches can also access the app.
In fact, that’s how Wearable Challenge accesses glucose data for users to participate in the challenge.
Key Takeaways:
- Dexcom Clarity can give you more detailed graphs and charts, though most of the same info is available in the app.
- The main benefit of Dexcom Clarity is that healthcare professionals can also access the data.
Purchasing and Cost
I purchased my Dexcom Stelo on Amazon for $95, though you can also buy it directly from Stelo's website for $99. Dexcom also offers a subscribe and save option, which brings the price down to $89.
However, if you plan to sign up for a companion CGM program, such as Nutrisense, the Dexcom Stelo is often included with your purchase through that third party.
As the Dexcom Stelo is an over-the-counter product, it is not covered by insurance, but it is HSA/FSA eligible.
Included with the purchase are two sensors, each lasting about 15 days (for a total of roughly one month's supply), and access to the app.
Unfortunately, there isn't an option to buy one sensor if you just want to try it out for two weeks.
Key Takeaways
- It’s about $95 for two sensors and can be purchased on Amazon or through Stelo
- You can’t purchase just one sensor
- It’s not covered by insurance but is HSA/FSA eligible
Dexcom Stelo vs Abbott Lingo
Right now, the Dexcom Stelo and Abbott Lingo are the only two OTC CGMs designed for non-diabetics who want to optimize their health and wellness.
Therefore, I thought it would be worthwhile to briefly discuss the key differentiators between them.
First, both of these products are quite similar. The sensors last about 14 days and neither require scanning or calibration.
The apps also show your current blood sugar level as well as your trend over the past several hours. And, you can scroll back to previous days to see historical data.
Additionally, there’s a target glucose range, which you can adjust, and you can track time in range over several days.
To track the data over time, you can also view historical data in both apps, and log meals, workouts, and other activities.
The Abbott Lingo has a slightly more complex looking user interface, though the information in both is more or less the same.
The main differences come down to this:
- Pricing: Both are more or less the same for a month’s supply of sensors. Yet only the Abbott Lingo allows you to purchase just one sensor, making it a cheaper alternative if you only want to try out an OTC CGM for two weeks.
- iPhone/Android Compatibility: Only Dexcom Stelo works on both iPhone and Android. Abbott Lingo currently only works on iPhone.
- Update Frequency: The Dexcom Stelo only updates every 15 minutes whereas the Abbott Lingo updates every minute. This isn’t a big deal unless you want to monitor your glucose levels minute by minute during a workout.
I have a more detailed breakdown of the Dexcom Stelo versus the Abbott Lingo, but those are really the main differences between both options.
Is The Dexcom Stelo Worth It?
Overall, I loved using the Dexcom Stelo, and I’d recommend to anyone who wants to:
- Better understand how different foods impact your body (and foods that contain hidden sugars)
- Maximize workouts
- Be held accountable for nutrition consistency
When wearing the Dexcom Stelo, I was surprised to learn how a high sugar/carb dinners would affect my glucose all the way through to the next morning.
However, I did find that the data alone wasn’t always enough to hold me accountable.
This is why we started Wearable Challenge.
It’s an accountability solution where participants stake $20 per day to stay under 120 mg/dL for the 14 days of the challenge.
If you spike over that threshold, you pay $20. If you stay in range, you’re entitled to the pot (of lost stakes).
It’s more effective than a coach, because the $20/day stakes are highly motivating, and with CGM data, it’s impossible to cheat yourself.
Join Wearable Challenge today to unlock the best version of yourself.